The Fundamentals Of Great Bending
Bending is one of the most expressive and important techniques of the electric guitar, and the ability to bend successfully and soulfully is a prerequisite for any great rock guitarist.
In this lesson we will be taking an in depth look at the fundamentals that make up great bending and how to apply them into your own playing.
The Fundamentals Of Great Bending:
The fundamentals of great bending are but are not limited to:
- Bending In Tune.
- Using Extra Fingers As Support.
- Holding The Neck For Optimum Bending Potential.
- Muting Surrounding Strings
- Applying Controlled Vibrato To Bends.
We will take an in-depth look at each of these fundamentals as well as practice licks to help you apply them in context, so with out further a due, here are the fundamentals of great bending.
Bending in Tune
Would you believe me if I told you that the most important element of great bending is largely over looked by the majority of electric guitar players, but then, unfortunately a lot of the fundamental techniques that result in a great guitar player are.
The element I’m talking about is bending in tune. Think about it, how often have you heard other guitar players say; “I really like listening to this particular player because his bends are really in tune?”
How often have you heard other guitarists say, “I really want to get better at bending in tune.” If the wide spread ignorance to this particular topic wasn’t obvious before, I’m sure it is now.
Bending in tune is the most important thing about bending, full stop. Before you attempt your next bend on guitar I want you to be fully aware of what note you are bending to and what its supposed to sound like and feel like when executed properly.
Whether it’s a full tone bend, a ½ tone bend, a 1 and a ½ tone bend, a 2 tone bend or a quarter bend,
the key to bending in tune is to understand what note you are bending to, and how its supposed to feel and sound when you reach it.
What I mean by feel is this; a large majority of great guitar playing lies in muscle memory.
Over time your hands and fingers will be able to automatically execute different techniques because the physical action that is required has been written into their muscle memory. Muscle memory is a fantastic thing because playing the guitar well becomes easier and easier when you program your muscle memory full of good techniques.
But be warned, muscle memory can be a tremendous ally or a formidable foe.
Seeing as muscle memory will record unbiasedly, it will also record bad techniques, making guitar playing harder. Nothing is set in stone and bad techniques can always be rewired, it’s just that once they have been imbedded in a players muscle memory they can take a little longer to weed out.
But if you learn to harness the power of muscle memory by feeding it with good techniques, turning it into an ally and not an enemy, you can find yourself improving at an astonishing rate.
Every bend will feel a certain way when executed correctly, there will be a certain place on the fret board your fingers must reach, you will feel a certain amount of tightness in the string when you bend it to the correct point.
After time all of these elements will be programmed into your muscle memory allowing you to bend in tune automatically. To bend in tune choose a note on the guitar neck to bend, then reach up to the note that you are planning on bending to and play it, this is how your bend will sound when you bend it in tune.
Alternate between playing the note you are bending to and bending to it. Have a good listen, are you hitting that note as you bend to it? Are you slightly sharp? Slightly flat? Maybe you have been bending out of tune this whole time but never realised? Try this exercise all over the neck with different strings and different types of bends.
Another great exercise for bending in tune is unison bends.
Choose a note on either the B or G string to bend, now bend it using a unison bend. When you bend in tune you should hear the notes of the unison bend merge sonically into the same note.
Play these unison bends slowly, listening carefully to hear the point where they sonically merge, this is how unison bends sound when they are executed in tune. Play them a few more times this time being concious of how they feel when they sonically merge in tune, notice the tightness and pressure of the string when you hit the point that is in tune.
Is that the amount of tightness and pressure you usually feel when playing unison bends? If not, you may have been playing unison bends out of tune this whole time but never realised.
Now that we know how to bend in tune, here are some great practice licks to help you make out of tune bending a thing of the passed!
Jimmy Page Alternating Bending Lick
The first practice lick is a Jimmy Page style alternating bending lick in the key of E, in the 1st position of Em pentatonic at the 12th fret.
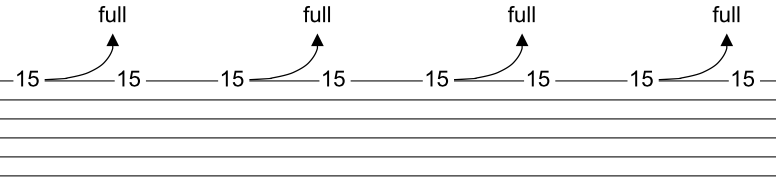
Jimi Hendrix Unison Bend Lick
The second practice lick is a Jimi Hendrix style unison bend lick in the key of E, in the 1st position of Em pentatonic at the 12th fret.

Using Extra Fingers As Support
When bending from your 2nd, 3rd or 4th finger, it’s important to use the other fingers behind the finger you are using to bend to assist the bend also.
Place the remaining fingers in the frets behind the finger you are bending from and press down with equal pressure, (remember you don’t need to push don’t that hard to fret strings), when you bend, bend with all the fingers, not just the one that is leading the bend.
You will still feel that the finger you lead the bend with will receive most of the pressure but having the other fingers behind it add an astonishing amount of strength and control to a bend.
Again, this may seem like common sense but believe me, its not. The amount of guitarists out there that look like they use additional fingers to support bends but still use only one because they don’t add enough pressure to the other fingers is incredibly high.
Poor support in bends can actually make it harder to bend in tune, as well as apply controlled vibrato. Next time you bend a note on your guitar, share the work load with the 3 or so supporting fingers behind the finger that is leading the bend.
Now that we know how to apply proper support to bends, here are some great practice licks to help you work on your bending support!
Ritchie Blackmore Minor Bending Lick
We are going to practice this technique with a Richie Blackmoore style minor blues lick in the key of E, in the first position of Em pentatonic, E natural minor and E harmonic minor at the 12th fret.

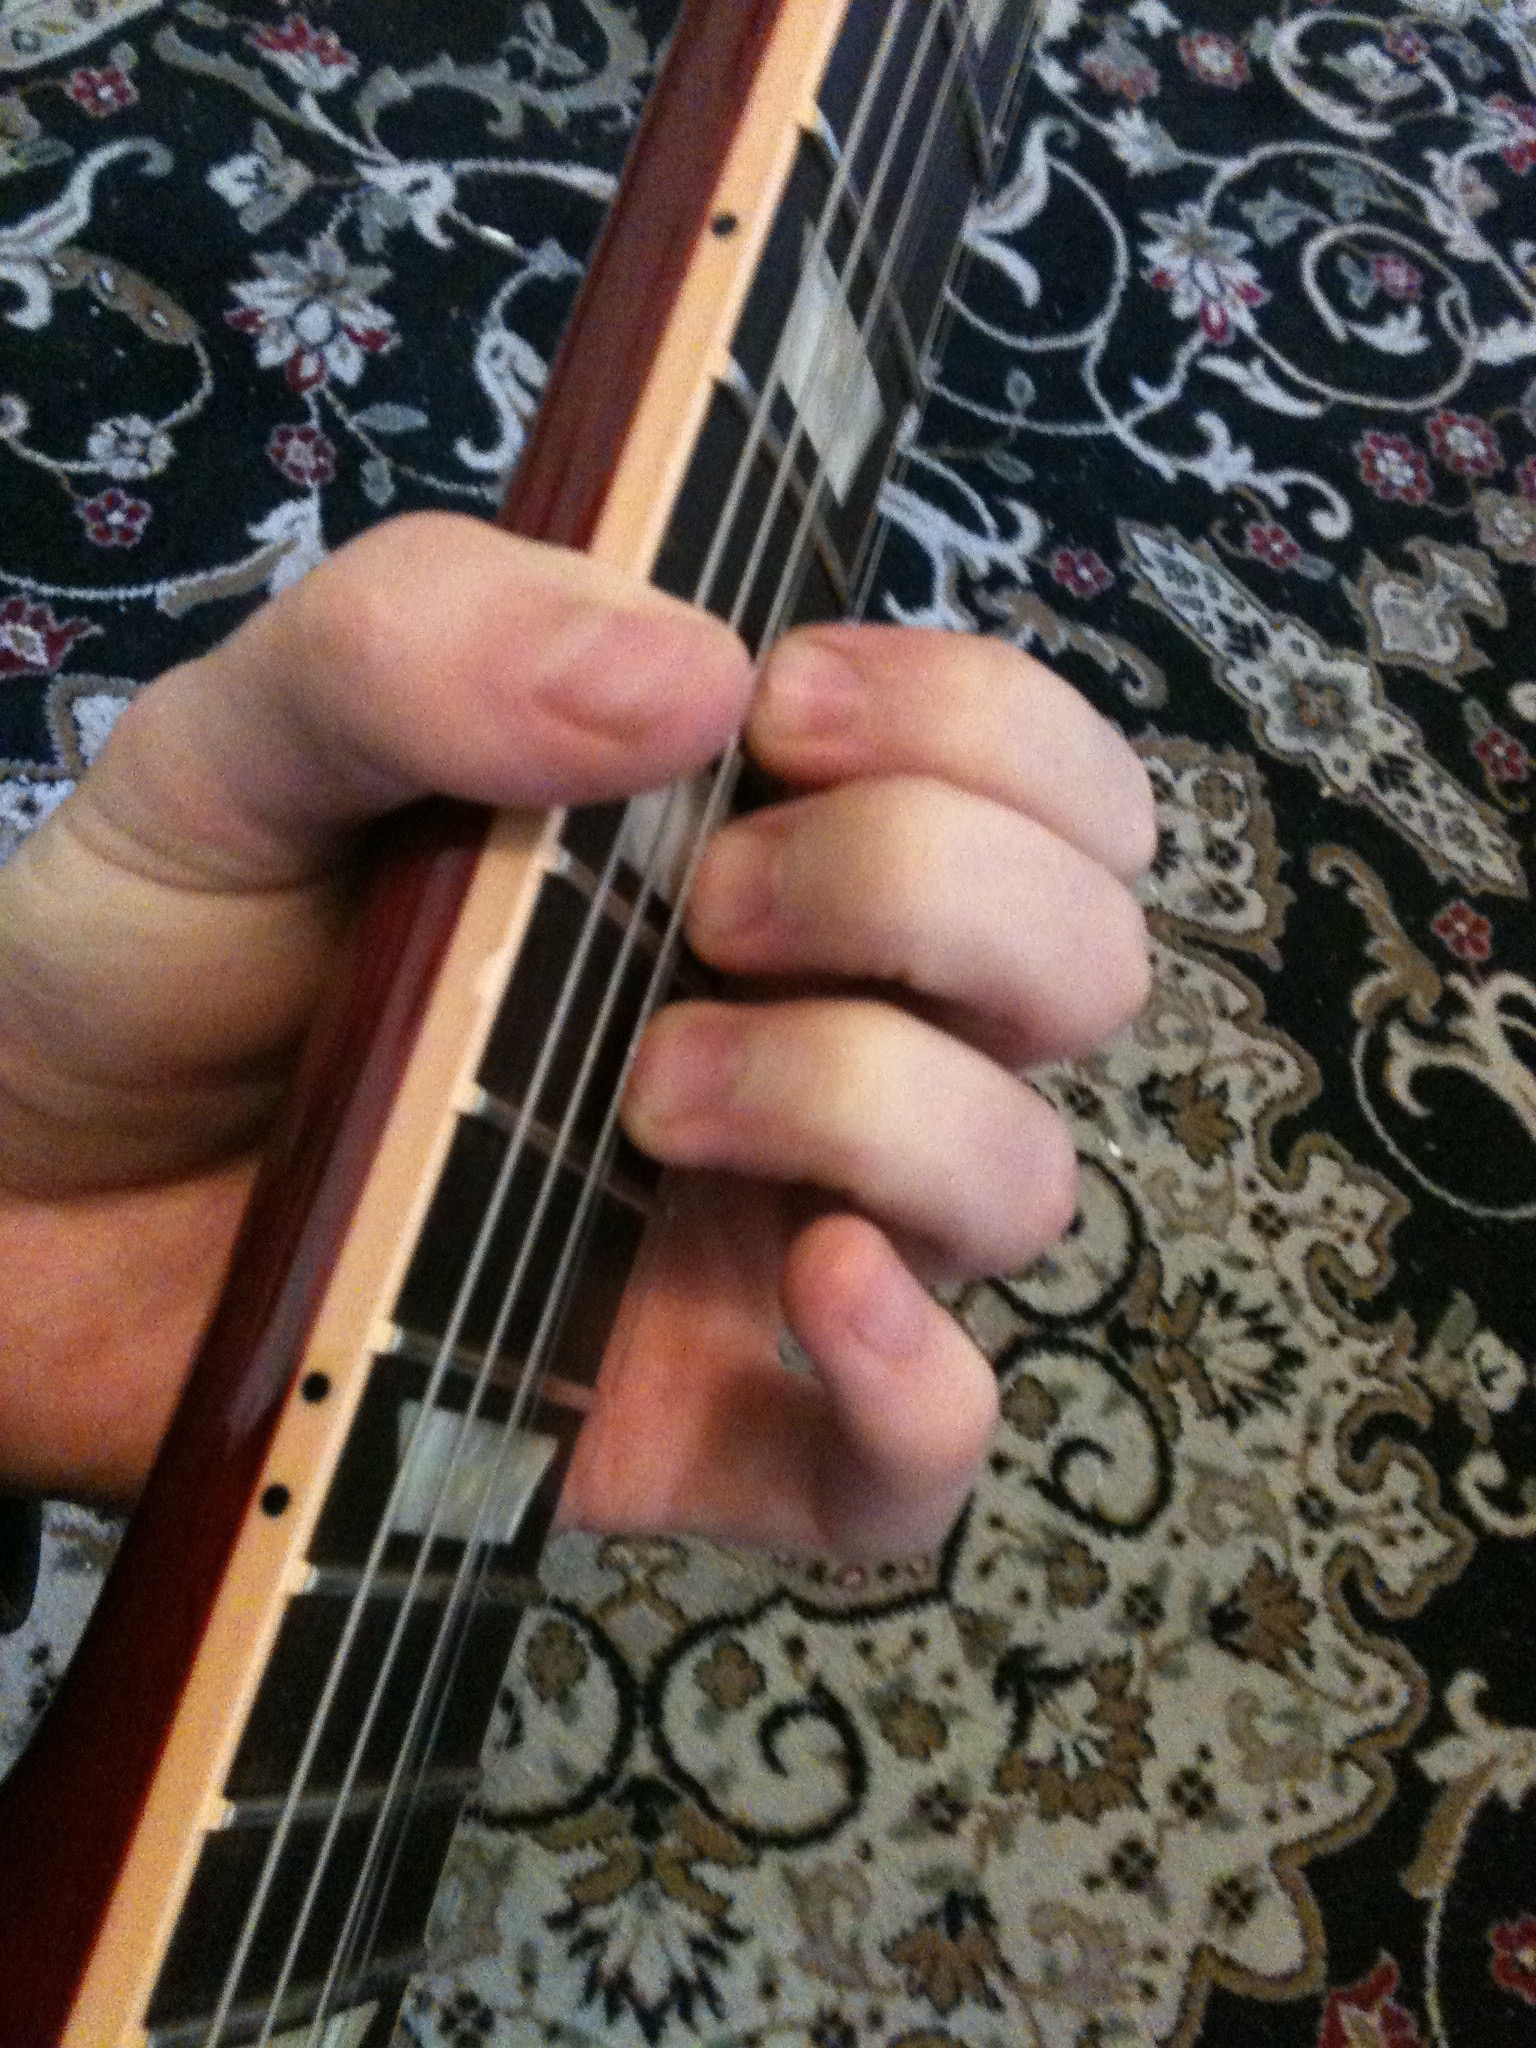
Holding the Neck For Optimum Bending Potential
One of the most important things for successfully bending strings is holding the neck properly. The most effective way of holding the neck for bending is with your thumb wrapped over the top of the neck and the curve of the neck filling up the curve between your thumb and your 1st finger.
By doing this you can use your thumb kind of like a winch to help pull your bends up. Now, you have probably come across some people who stress that you should always have your thumb anchored in the back of the neck, never to move so long as you live.
Putting your thumb in the back of the neck is very important for the proper execution of some techniques, but for bending things are a little bit different.
The thumb in the back of the neck idea is a classical concept, which is great for classical and classical’esc techniques, but string bending isn’t a classical technique, its a rock n roll technique, and when executing rock n roll techniques having the thumb wrapped over the neck inst just acceptable, in most cases its absolutely necessary.
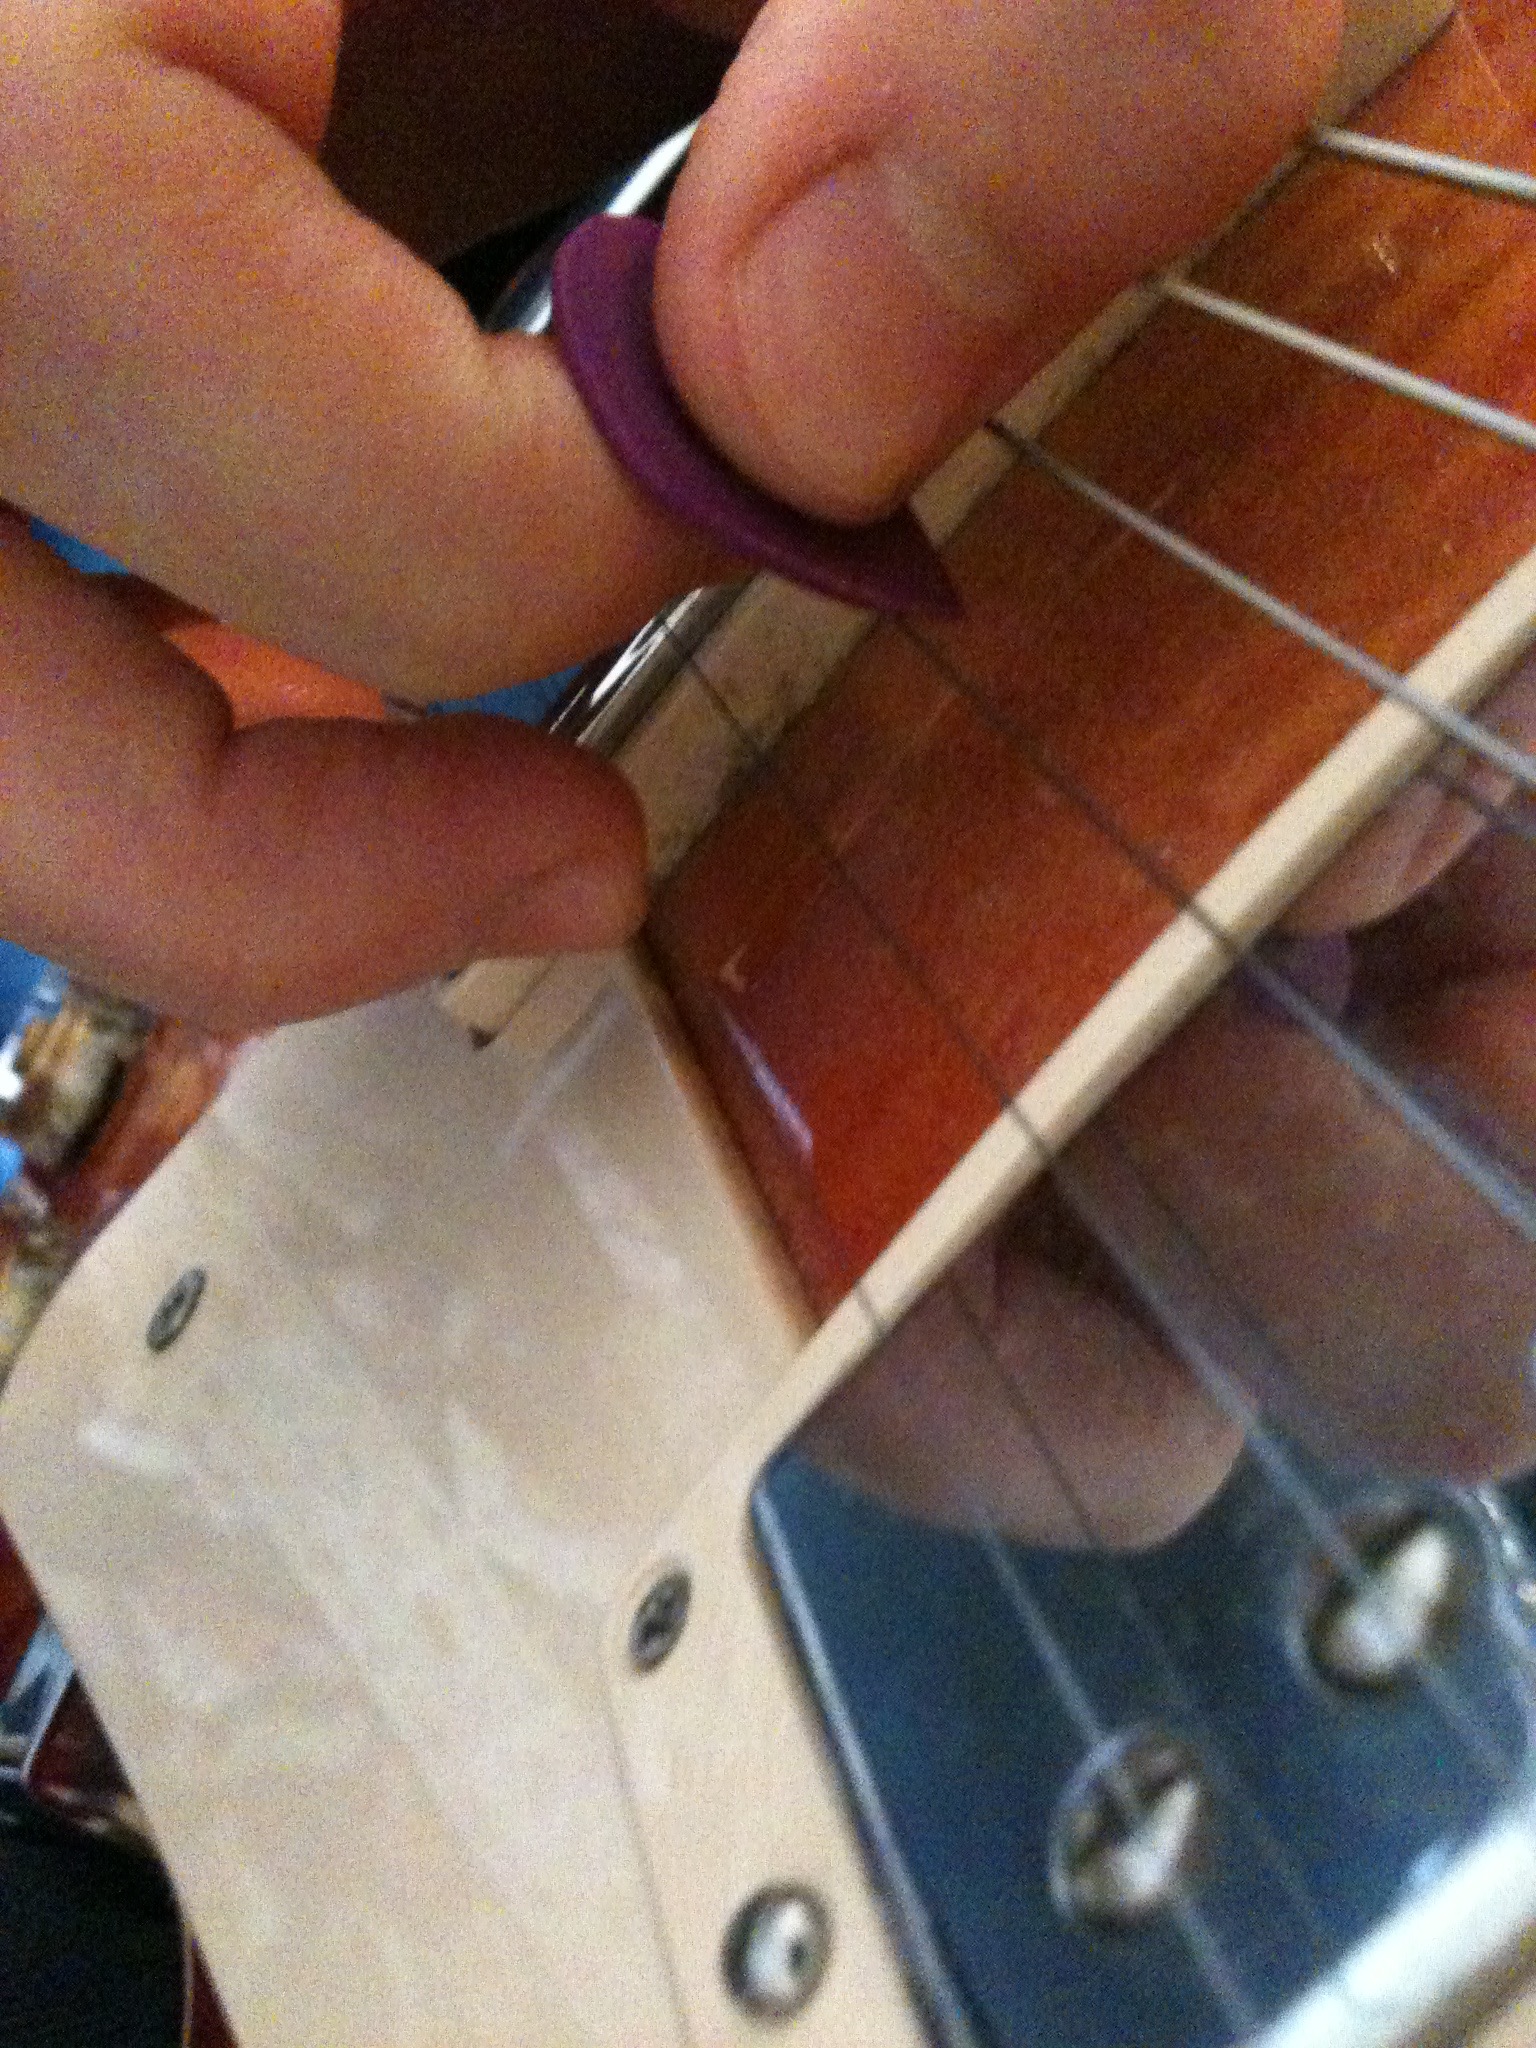
Muting Surrounding Strings
Here is another crucial technique that goes largely unnoticed by so many guitar players.
There are guitarists out there that are technically great but still don’t understand how to hold sustained bends or apply sustained vibrato to notes without clanging into the surrounding strings.
The answer is this, after you have picked a note and are preparing to execute a sustained bend with some vibrato, rest your pick on the string above the string you are bending to mute it and hold the string underneath the string you are bending with the middle finger of your picking hand to mute it.
This will allow you to hold a sustained bend with vibrato, or apply sustained vibrato to notes without the surrounding strings clanging away.
David Gilmour Sustained Bend Lick
We are going to practice this technique with this Dave Gilmour style bending lick in the key of E in the first position of Em pentatonic and E natural minor at the 12th fret.

Applying Vibrato To Bends
Now its time to mix two of the most important and expressive techniques for playing the electric guitar, bending and vibrato.
Adding vibrato to bends sound amazing and the ability to do it is a prerequisite for any great rock guitarist. Yet, so many guitar players still struggle with this technique. Some even avoid it entirely.
The key to mastering this technique, like everything, lies in steady practice. Bending requires a certain amount of hand strength (though, not as much as you would think) and strength is developed over time. So steady focused practice is the key.
To work on your vibrato within your bends, choose a note on the fretboard to bend and bend it. When your bend has reached the correct pitch of the note you are bending to, hold it there (this is a great time for you to practice muting the surrounding strings as well) now release the bend down a ¼ of a tone, now bend back up to the original bent note, most rock vibrato is bent around a ¼ of a tone.
Repeat this exercise a couple of times to get the feel of it.
Now grab your trusty metronome! Anyone who has studied vibrato with me before will probably know whats coming next, for those of you who haven’t this could be a first! Metronomes, for rock guitarists, are mainly viewed as a tool to increase their speed. But very little rock guitarists view metronomes as a tool for increasing their vibrato. And that’s exactly what where about to do.
Set your metronome to 60 BPM.
Now return to the bend you where playing previously, again bend the note to the correct pitch of the note you are bending to then release it down an ¼ of a tone, bend the note back up then release it down an ¼ of a tone.
Apply this exercise to the metronome at 60 BPM following this formula;
Click 1; Bend. Click 2; Release. Click 3; Bend. Click 4; Release.
Click 5; Bend. Click 6; Release. Click 7; Bend. Click 8; Release.
This exercise is one of the best I have encountered for working on applying controlled vibrato to sustained bends.Once you get more comfortable with it, and have built up your strength, try raising the BPM rate of the metronome.
Here is a practice lick to help you with adding vibrato to sustained bends that demonstrate this exercise.
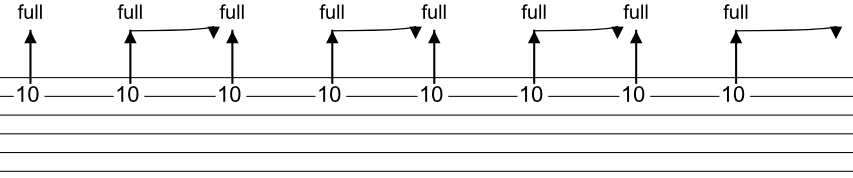
Metronome Bending Exercise
We are going to practice this technique with a bend on the B string at the 10th fret in the 4th position of Em pentatonic.
Conclusion
I hope you have enjoyed this lesson and learnt some invaluable life lessons for one of the electric guitars most expressive techniques.
If you are interested in guitar lessons then fill out the form for your FREE evaluation lesson by clicking the FREE lesson button below.
CALL NOW
To book your FREE evaluation lesson
0490 137 621
![]()